Self-Signed Certificate Generation
By Lex Li
This page shows you how to use Jexus Manager to generate self-signed certificates.
Background
Before setting HTTPS bindings, it is very important to configure server certificates ahead.

Self-signed certificates are usually used during testing.
Note
Instead of using tools like Jexus Manager, you can use PowerShell to generate self-signed certificates with customization. Please refer to Microsoft Docs .
Self-Signed Certificate Wizard
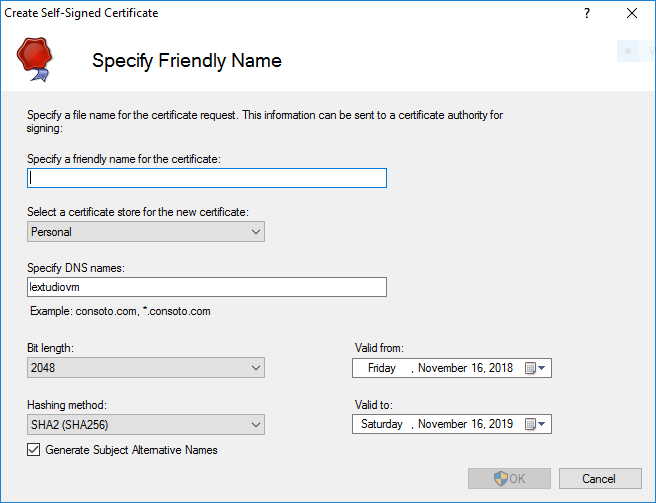
Jexus Manager’s wizard is more powerful than the one IIS Manager offers, so the generated certificates are Chrome/Firefox friendly.
It allows you to specify multiple DNS names for the certificate (so-called SAN certificates).
Note
It uses the first DNS name as Common Name.
It allows you to generate wildcard certificates if the DNS names contain wildcard.
It offers SHA2 hashing method.
It allows you to set expiration date.
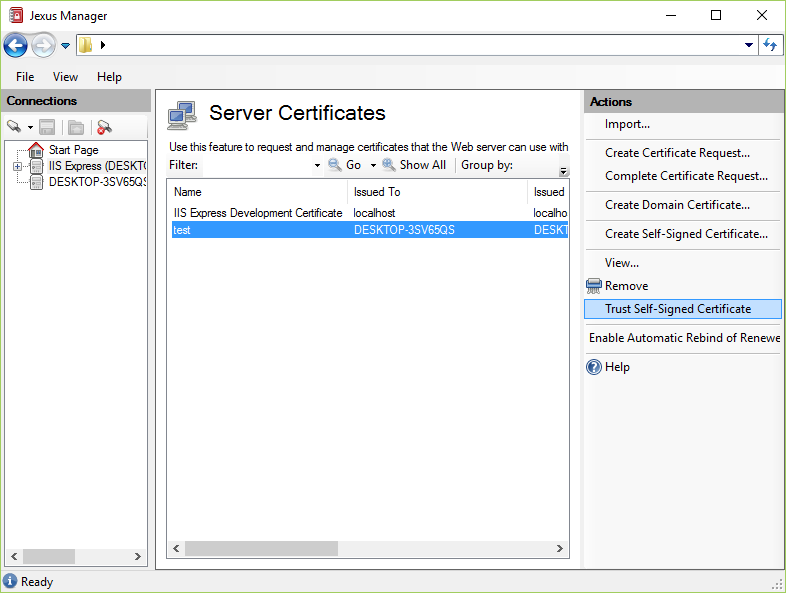
In Jexus Manager, the self-signed certificate wizard can be opened as below,
Choose a server node in the Connections panel.
In the middle panel, click Server Certificates icon to open the management page.
Under Actions panel, click “Generate Self-Signed Certificate…” menu item.

Fill in the necessary information in this wizard page, and then click OK. Jexus Manager will generate a new certificate and install it to the desired store.
To Trust Self-Signed Certificate
A self-signed certificate is not trusted anywhere by default. It would be sometimes useful to let browsers trust such and suppress certain warnings.
For browsers like Internet Explorer, Chrome, and Edge, the self-signed certificate can be installed to Trusted Certificate Authorities store of the current user account.
Note
However, browsers like Firefox do not honor such Windows configuration, and you need to refer to their own documentation to learn how to trust the certificates.
Jexus Manager is capable of automating such on the current machine,
Choose the self-signed certificate from the list.
Under Actions panel, click “Trust Self-Signed Certificate”.
Accept the certificate in the following system dialog.

Note
Behind the scene, Jexus Manager exports the certificate from My store of the machine account, and install it to Trusted Certificate Authorities store of the current user account.
If you want to manually achieve the same, then you should learn how to use the MMC snap-in from Microsoft Docs .
Note
If you want other machines to trust a self-signed certificate, perform the same on each of them. However, a valid certificate issued by domain CA or an external CA is recommended, as they are usually trusted by Windows by default.